
One of the major features of the driver app is the ability to digitally run through reservations at the time of service. This allows drivers to digitally create run records, making record keeping and paperwork for DOT much easier for you as a company. This tutorial serves the purpose of breaking down each step of this process.
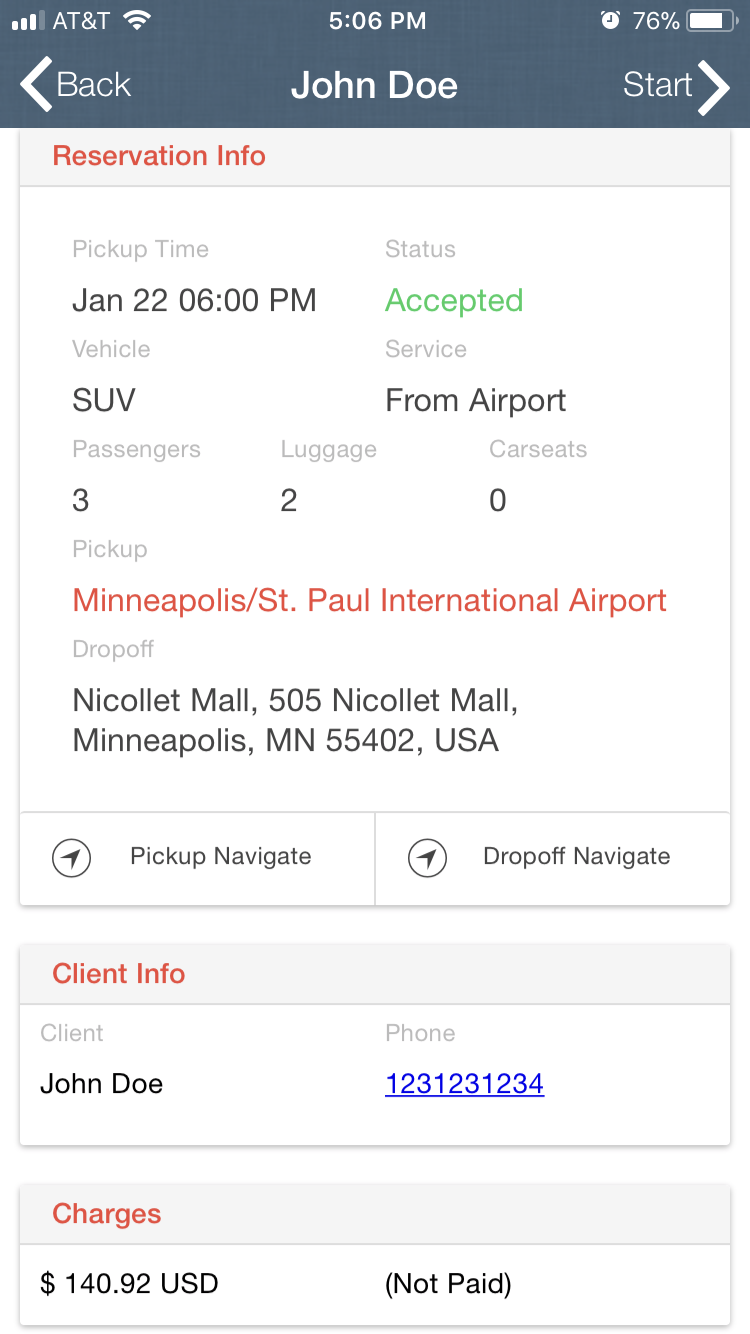
When a driver is ready to drive towards their pick up, they should open their driver app and click open the Run Details page of the reservation they’re about to start. To begin, press “start” in the upper right corner (pictured below on the left).

1. The first step to the digital run through is the vehicle checklist (pictured above right). If you’ve added checklist items, they will appear here and drivers can check off (click the circle) each item as they inspect it on the vehicle. They are able to type in any defects if they find any and then use their finger to sign the signature box before pressing “accept”. Want to add/edit your vehicle checklist? See Vehicle Checklist.
2. The next page will begin the digital run log time stamps. Notifications can be sent to owners on their apps and via SMS to a phone number of your choosing. See Run Progress SMS. Drivers have the option to notify the client with an SMS that they are on the way with an ETA. Starting mileage can be input and then upon clicking “Timeout”, their drive time will begin and they can begin driving (pic. below left).


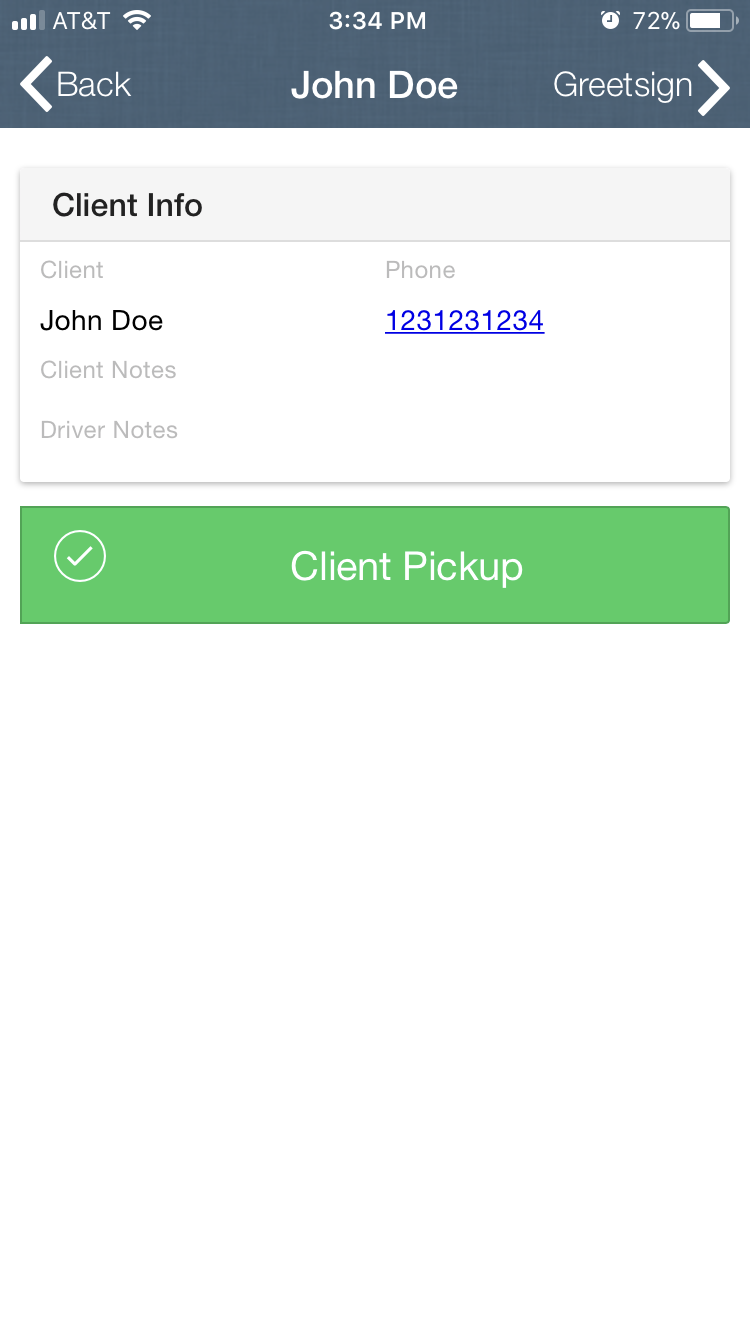
3. The next page lists the client’s name, phone number (if shown) and the pick up address. Drivers are able to click the phone number if they need to call the client. They can also use the “navigate to client pickup” button to obtain a route to their destination. Once they’ve arrived, they can send an SMS to the client letting them know that their driver has arrived. In addition, upon clicking “actual arrival”, a push notification will also be sent to passengers using the passenger app (pictured above right).
4. On this page, the driver can use the button in the top right to pull up a meet and greet sign if needed. When the client actually gets into the vehicle, the driver can press “actual pick up”. Sometimes arrival and pick up can be different times if the driver has to wait and it can be helpful to establish that a driver arrived on time, even if the client is delayed in getting into the vehicle. (below left).

5. The driver can now view the drop off address and has the option to route from the pickup to dropoff using the route button. When arriving at the drop off destination, the driver can mark the trip as paid (helpful if the driver collects). Click the “client dropoff” button when the client has been dropped off (pictured above right).
6. This final step allows a driver to input the ending mileage plus any special note that needs to be addressed or recorded such as extra stops had been added, additional time requested, damage or cleaning fees that need to be assessed etc. Follow this by clicking the “Time In” button and then the time stamps and trip will come to an end (pictured below left).


This will finalize the trip and the screen will reflect this with a message saying the trip is completed (pictured above right). This will also be reflected in the backend.
Once a trip is officially completed, the information from the trip will appear on the backend of the system for viewing. You can see the time stamps by viewing the run logs. You can also view the signatures, time stamps, drive time and other information on the trip sheets.
Curious about what the rest of the driver app looks like? Check out Driver App Layout. Please note: There are a few settings that may add more steps or information within the driver app than seen in this tutorial. Be sure to test the driver app out yourself to ensure it is set up the way you like and as always, feel free to reach out to us with questions at support@bookridesonline.com.