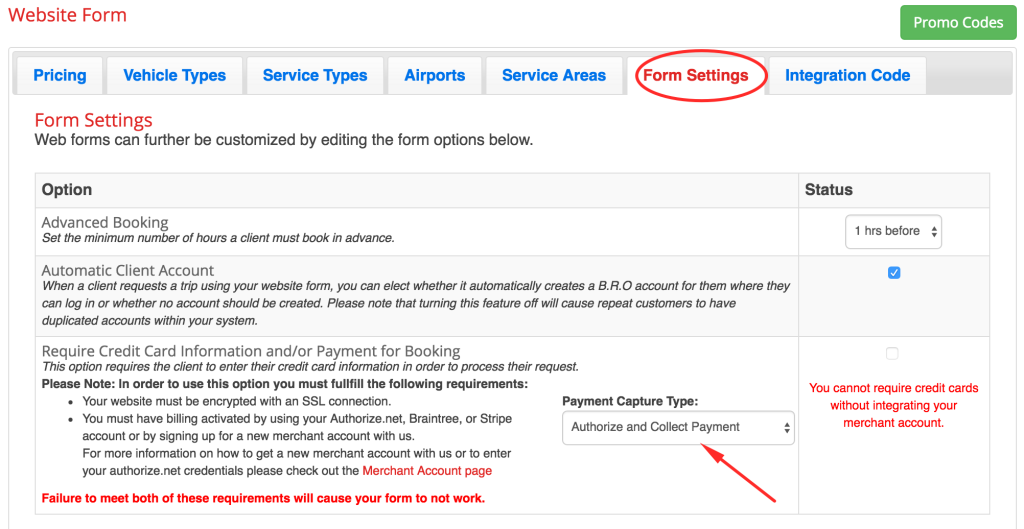
If you’ve completed Steps 1-5, you are ready to take a few moments to set up your website form settings. You can reach these settings by choosing the tab under the Website Form page marked “Form Settings”.
There are three options that need to be set. The first option allows you to choose how many hours in advance you require a client to book. Use the drop down menu to the right of this option to set the number of hours.
The second option allows you to have automatic B.R.O. accounts set up for every client who submits a reservation using the form. What’s a BRO account? See our FAQ article about this here. If you would like this option turned on, check the check box located to the right of this option.
The last option has to do with credit card collecting. You can only use this setting if you have synced your merchant account with us already. Need to know how to do this? See our tutorial on Integrating Your Merchant Account.
If you fulfill all of the requirements explained in this option’s directions, you can check the box and it will require clients to input their credit card information to request a quote or reservation. You can use the drop down menu shown by the red arrow above to choose what you do with that credit card information: Authorize and Collect Payment, Capture Payment Details Only, or Capture CC information and allow clients to pay if they would like to.
Don’t want to require clients to input their credit card information on the reservation form? Simple, just do not check the box next to this option.
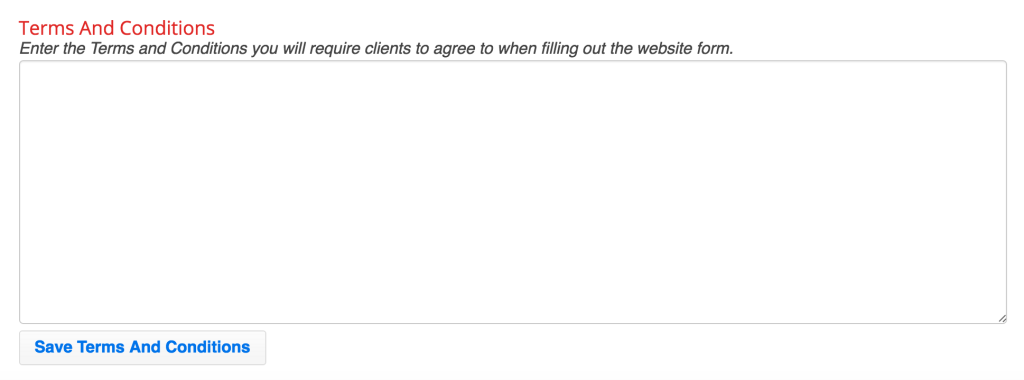
Directly below these three settings there is a text box where you can input your terms and conditions.
Entering terms and conditions here will force your customers to check a box saying they agree to the terms before they can submit a quote/reservation request on the website form.
Now that you have gone through steps 1-6, your website form is fully set up and you are finally ready to move on to Step 7: Integrating the Website Form into your Website.


