
If you have successfully completed Step 3: Adding Airports, you can now move to the next tab marked “Service Areas”. Here, you add all of the cities and/or postal codes that you provide service to. Zones can also be created if they are needed for zone to zone pricing.
Please note: Exact quotes can only be given to customers for cities and/or postal codes that you have entered here. If they request a quote for an area not listed here, it will require you to send them a quote email.
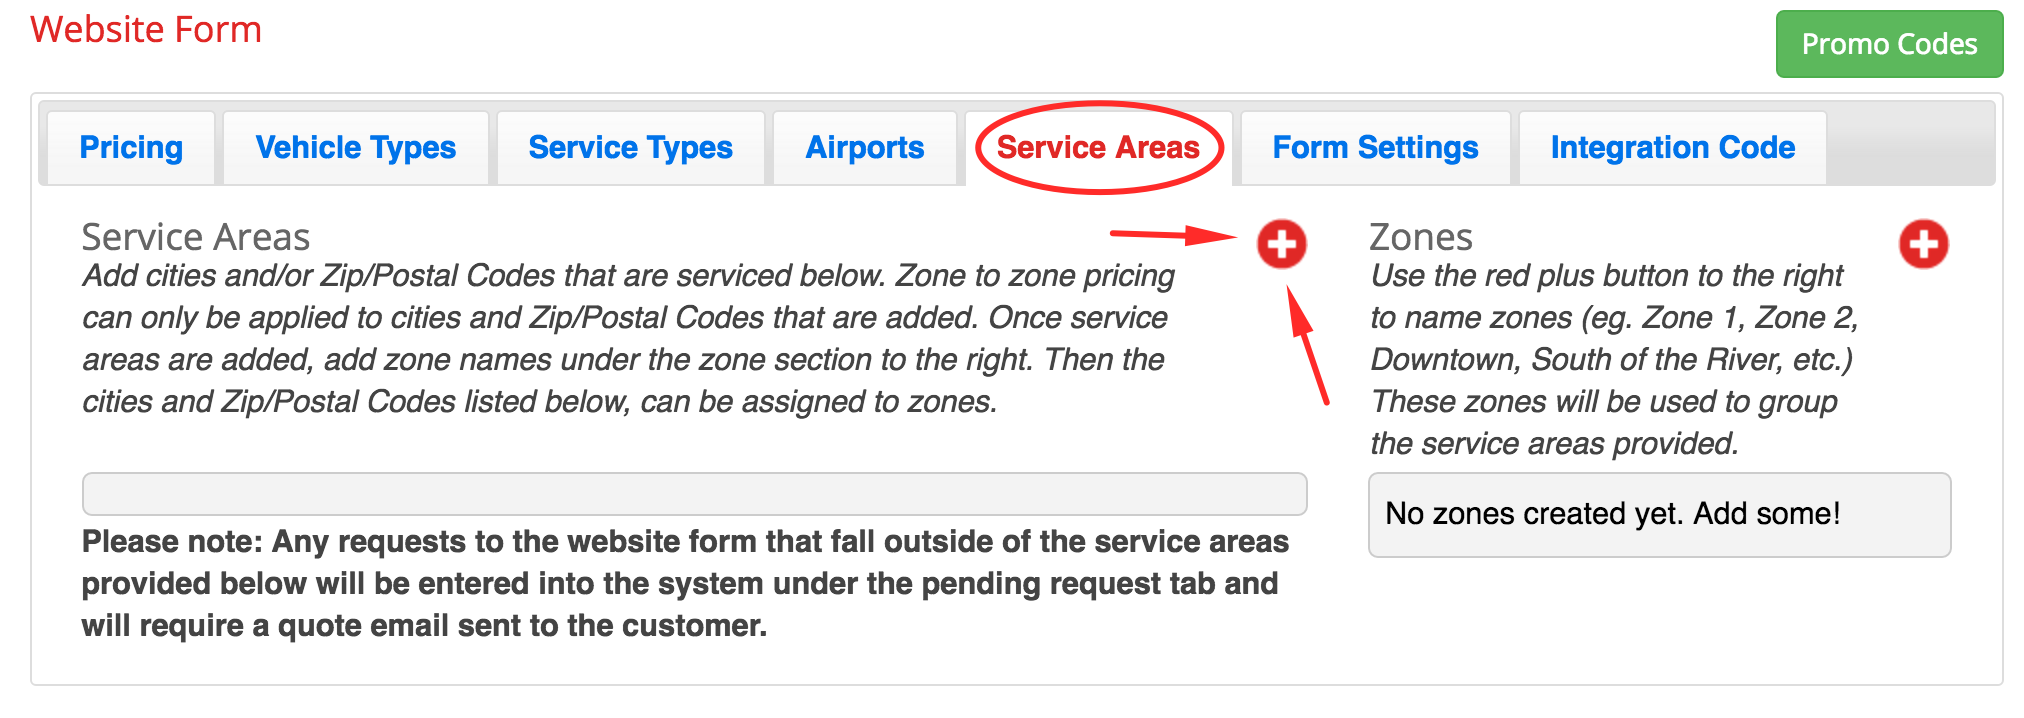
You’ll notice that this page is separated into two sections. First, add service areas by using the red plus button indicated by the red arrow above. A window will open allowing you to add a new service area.

Enter either a postal code or city name in the search field. Remember, you will want to add each and every city and/or postal code that you provide service to in order for our system to give your customers quotes.
Once you’ve added all of your service areas, they will be listed like you see below in the “Service Areas” tab. You can add more service areas or delete service areas at any time. Use the red trash can located to the right of each service area to delete it.

If do not use zone to zone pricing, you are now finished with this step and can move on to Step 5: Pricing. If you need to set up zones for zone to zone pricing, use the red plus button noted by the red arrow above to set up Zones. A window will open asking for a zone name.
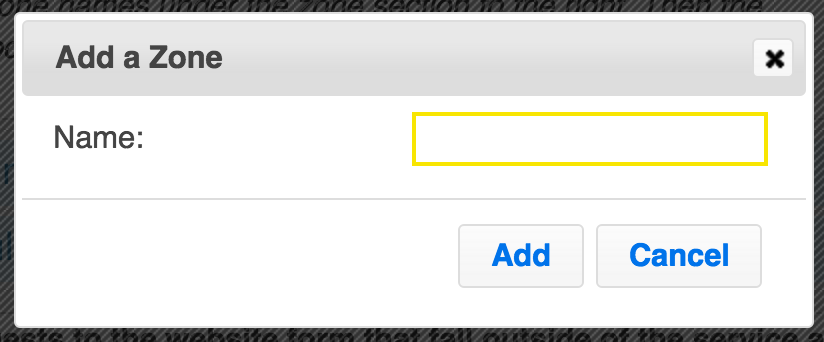
Zone names can be anything you need them to that help you establish certain areas (eg. Zone 1, Zone 2, Downtown, South of the River etc). These Zone names will be used to group the service areas that you’ve already input into service areas. All service areas within one zone will be priced the same if you use zone to zone pricing.
Once you’ve added the zones that you need, you’ll see them listed on the right side of the screen, along with any airports that you’ve added in Step 3.
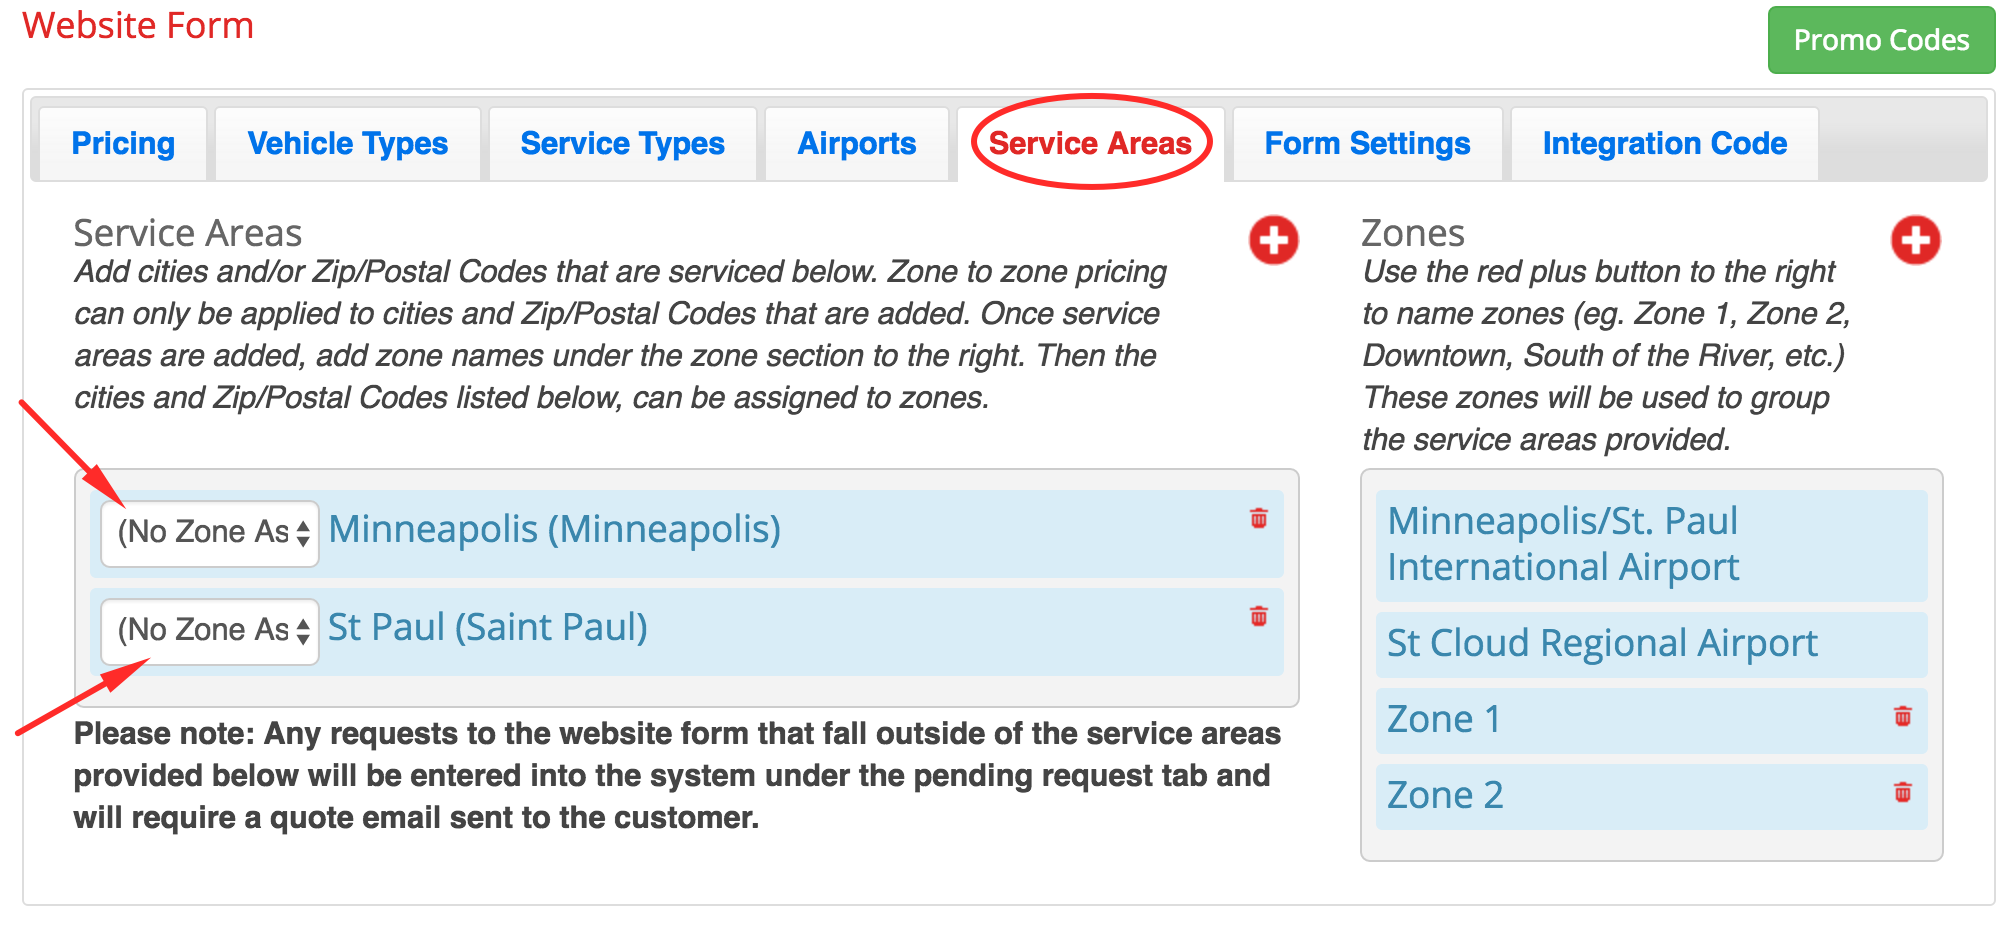
You’ll also note that now there is a drop down menu located to the left of each service area you provided at the beginning (cities and postal codes). All of the zone names that you’ve added will be listed as options to assign to each city and postal code you provided.
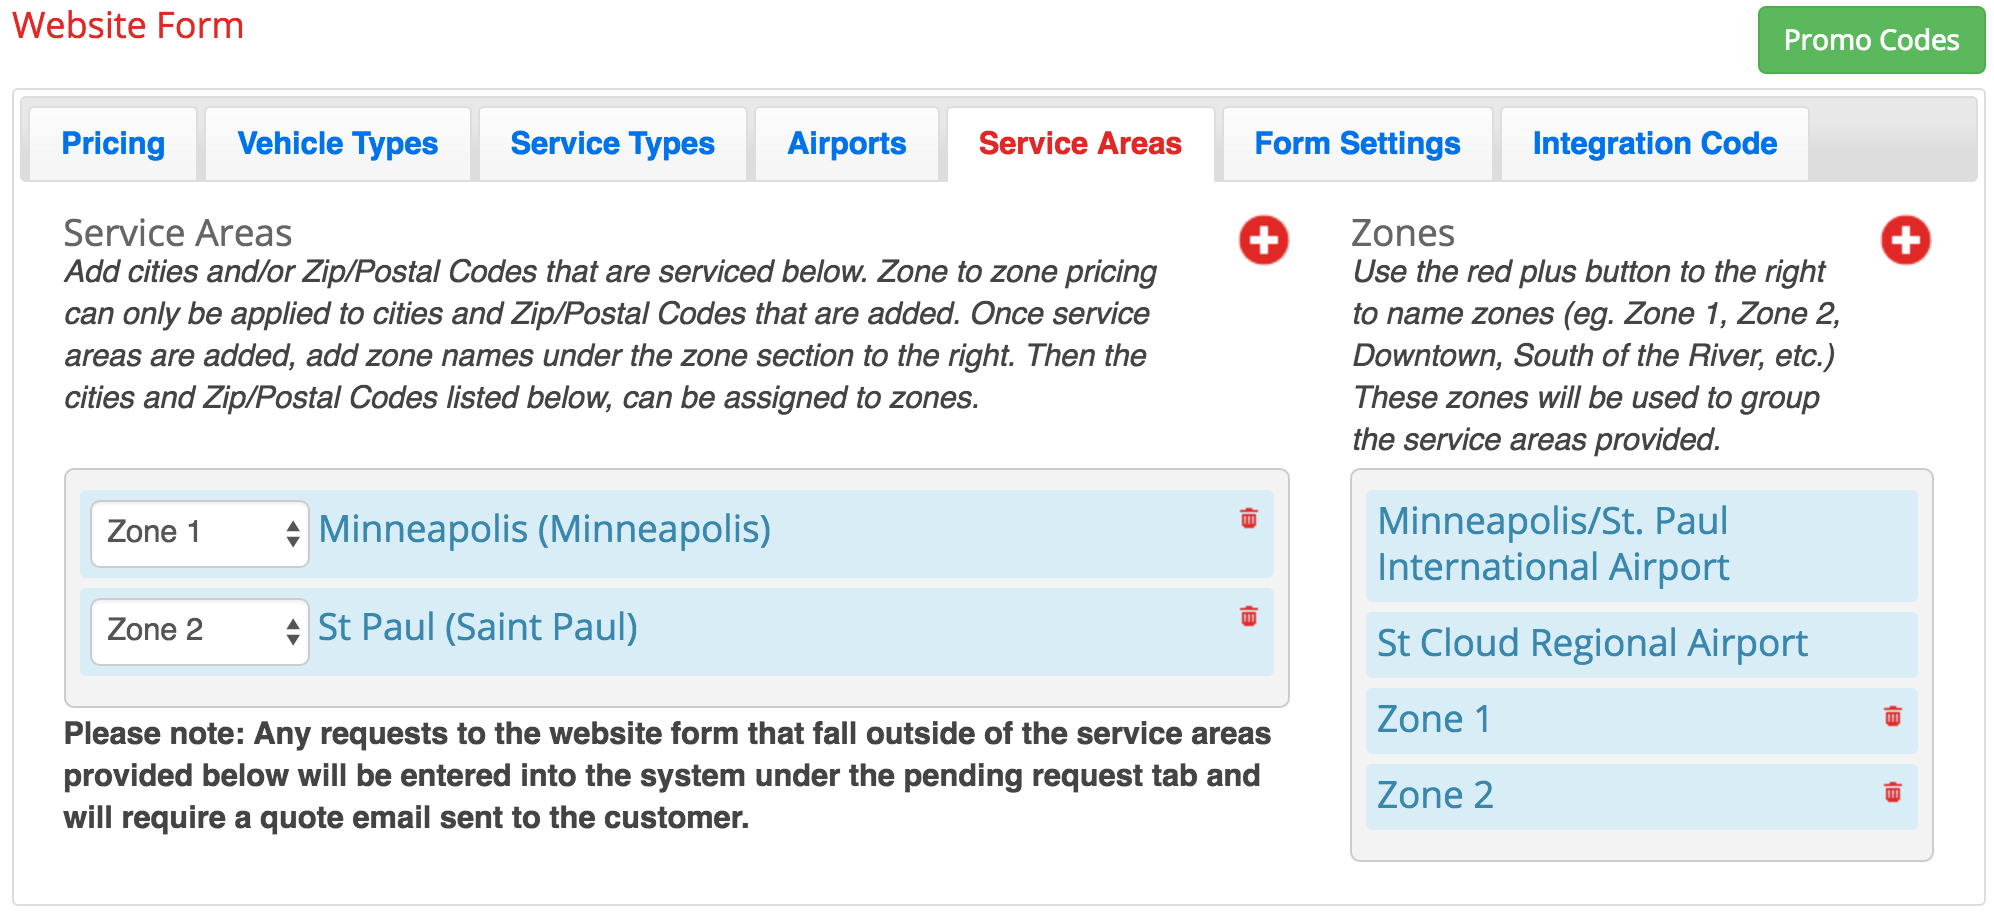
An example of what it would look like once you’ve assigned zones is shown below. A zone can have one or multiple cities/postal codes grouped within. Group them however works best for your zone to zone pricing.
The zones you’ve set up will appear in the next step as you’re setting up pricing.
Please note: You need to enter all cities and postal codes that you provide service to in order for our system to give customers quotes. However, you do not need to set up and assign zones to the cities and postal codes unless you use zone to zone pricing.
You are now ready to move on to Step 5: Pricing. This is where you will set up your pricing table.